logo
Free 1:1 Strategy Session
Not sure what’s next? Let’s fix that.
In 30 minutes, we’ll help you uncover what’s not working — and map a path to move forward with confidence.


Honest feedback from experts
Actionable advice tailored to your goals
No hard sell — just clarity
Book Your Free Call
Expert Insights for Tech Leaders
Curious minds like yours deserve smarter content.
Get access to the trends, tools, and ideas shaping tomorrow’s products — before everyone else.
Fresh blogs, deep dives & frameworks
Built for founders, PMs & tech leaders
No spam — just the good stuff
Index
Explore Tech Stack

AWS Account Setup Guide for New Users and Teams

AWS Account Setup Guide for New Users and Teams

Whether you’re exploring AWS for personal use or launching business workloads, getting started the right way is crucial for security and cost control.

AWS generated over $100 billion in net sales in 2024, making it the world’s leading cloud platform (Statista, 2025). 

So, it’s no wonder so many users search for an AWS beginner guide or ‘how to create an AWS account safely and effectively’.

In this article, we’ll guide you through a step-by-step AWS account setup, from how to create a free AWS account to securing your environment with best practices for AWS account setup. 

Let’s dive in and get your Amazon Web Services account ready for action.

Hire Top Tech Talent to handle your AWS setup efficiently and securely.

What is an AWS Account?

An AWS account is your personal or business gateway to Amazon Web Services. 

Think of it as a digital workspace where you can run websites, store data, or explore new tech without needing your own servers.

When you create an AWS account, you’re setting up access to powerful tools and services through the AWS Management Console. It’s the place where you control your cloud resources, check costs, and keep things secure.

People sign up for AWS for all sorts of reasons:

  • Host Websites and Apps: Launch sites, apps, or software for global users.
  • Store and Protect Data: Save photos, backups, and files securely.
  • Experiment and Learn: Try new ideas using the ‘create free AWS account’ option for limited free services.
  • Analyze Data and Build AI: Crunch big data or create machine learning solutions.

Whether it’s for business or just exploring AWS for personal use, it’s smart to follow AWS account setup best practices from the start. A secure and well-organized account can save you time, money, and stress later on.

Your Amazon AWS account is the first step on your cloud journey and the start of your step-by-step AWS account setup.

So, let’s discuss how you can start creating your AWS account. 

Step 1: Creating Your AWS Account

Creating Your AWS Account dashboard Picture


You’ll need to sign up for an AWS account to get started. Follow these steps:

  1. Visit the AWS Website:
    • Open your web browser and go to aws.amazon.com.
    • Click the Create an AWS Account button in the top-right corner.
  2. Enter Your Email and Account Details:
    • Provide a valid email address and choose a password.
    • Enter a name for your AWS account (e.g., your company name or a project name).
    • Click Continue.
  3. Provide Contact Information:
    • Fill in your contact details, including your full name, phone number, and address.
    • Select whether this is a Personal or Professional account.
    • Agree to the AWS Customer Agreement and click Create Account and Continue.
  4. Verify Your Email:
    • Check your email for a verification code from AWS.
    • Enter the code on the verification page and submit it.
  5. Complete Account Activation:
    • AWS may require a phone verification step. Follow the instructions to receive a call or text and enter the provided code.
💡 Pro Tip

Use a professional email address (e.g., admin@yourcompany.com) for your AWS account to keep it separate from personal emails. This makes it easier to manage and share access later.

Step 2: Adding a Payment Method

Adding a Payment Method dashboard image


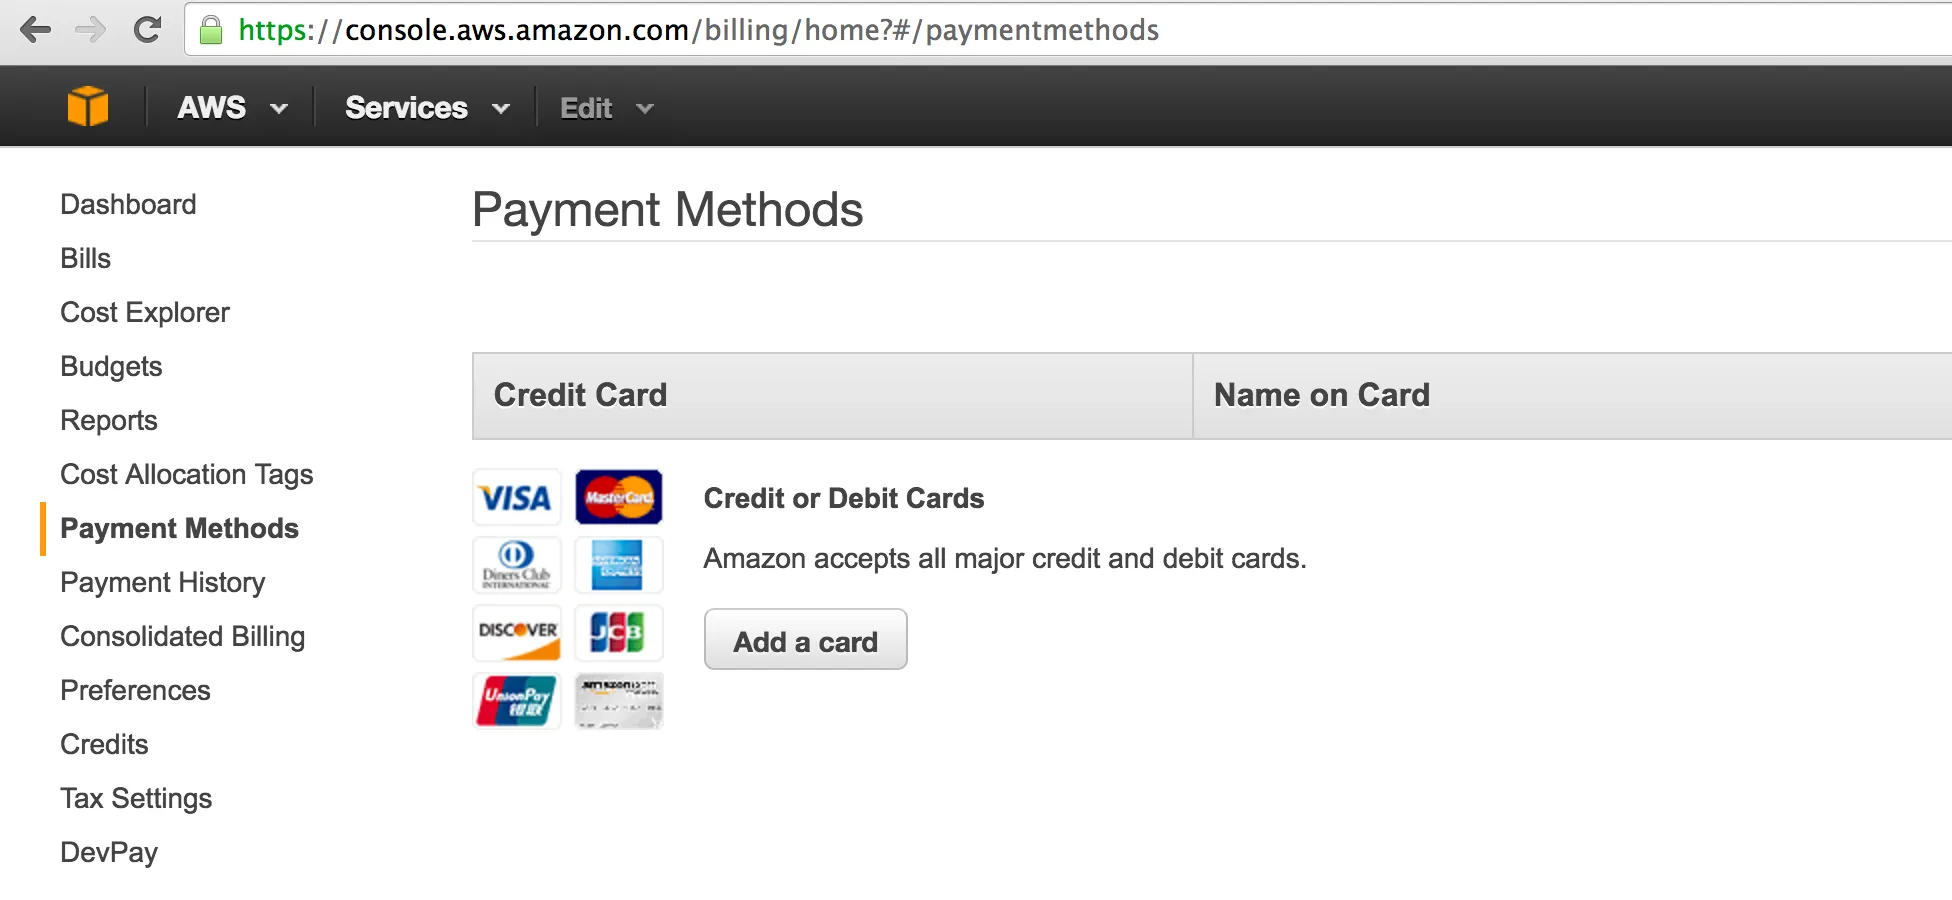
AWS requires a valid payment method to activate your account and cover any usage costs. Here’s how to set it up:

  1. Log In to Your AWS Account:
    • Go to aws.amazon.com and sign in with your new account credentials.
  2. Access the Billing Dashboard:
    • From the AWS Management Console, click your account name in the top-right corner and select Billing Dashboard (or search for “Billing” in the search bar).
  3. Add a Payment Method:
    • In the Billing Dashboard, click Payment Methods in the left menu.
    • Click Add a payment method.
    • Enter your credit or debit card details (card number, expiration date, and CVV).
    • Provide a billing address that matches your card.
    • Click Add or Save.
  4. Verify the Payment Method:
    • AWS may place a small, temporary charge (e.g., $1) to verify your card. This charge is typically refunded within a few days.
    • Check your bank statement or contact your bank if you don’t see the verification.
💡 Pro Tip

Consider setting up billing alerts to monitor your AWS spending. In the Billing Dashboard, go to Budgets and create a budget to receive notifications if your costs exceed a certain amount.

Step 3: Locating and Sharing AWS Credentials

Locating and Sharing AWS Credentials dashboard


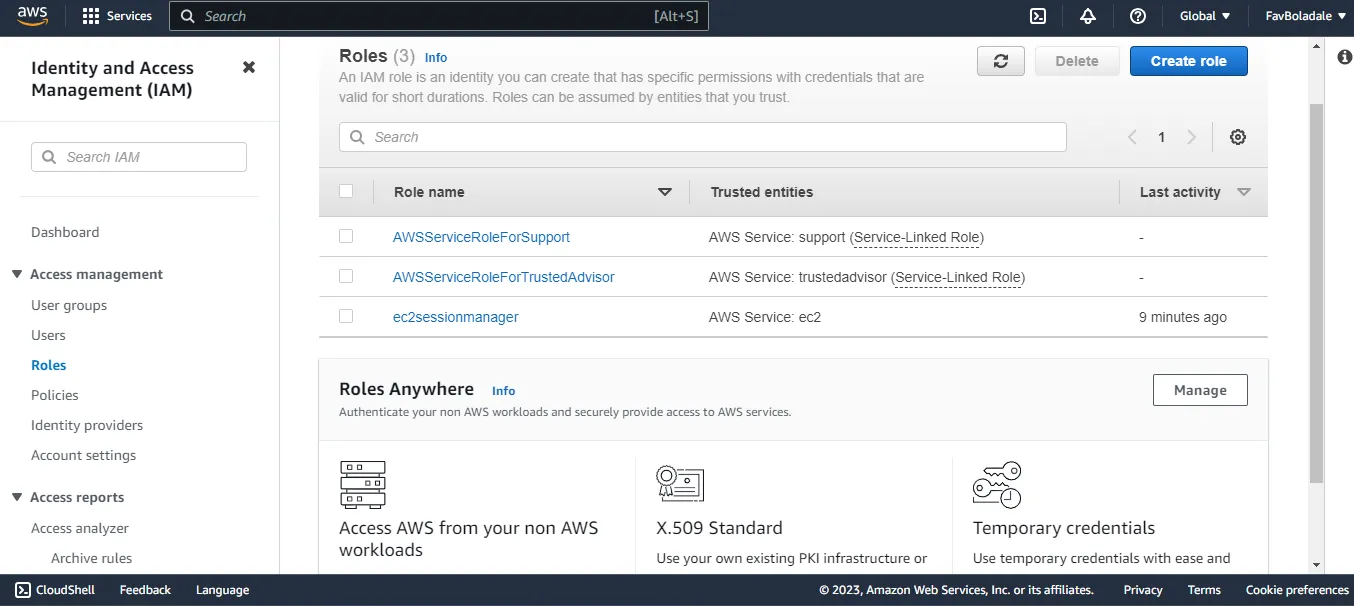
To allow our team to work in your AWS environment, you’ll need to create and share secure credentials, such as an IAM role or access keys. 

For security, we recommend using an IAM role, but we’ll cover both options.

Option 1: Creating an IAM Role (Recommended)

An IAM (Identity and Access Management) role allows our team to access your AWS account securely without sharing long-term credentials.

  1. Access the IAM Console:
    • In the AWS Management Console, search for IAM and click to open the IAM dashboard.
  2. Create an IAM Role:
    • In the left menu, click Roles and then Create role.
    • Select AWS account as the trusted entity type.
    • Enter our AWS account ID (we’ll provide this to you securely).
    • Check Require external ID and enter the external ID we provide (this adds an extra layer of security).
    • Click Next.
  3. Assign Permissions:
    • Choose the permissions our team needs (e.g., AdministratorAccess for full access or specific policies as discussed).
    • Click Next, name the role (e.g., “TeamAccessRole”), and click Create role.
  4. Share the Role ARN:
    • After creating the role, click on it to view its details.
    • Copy the Role ARN (e.g., arn:aws:iam::123456789012:role/TeamAccessRole).
    • Share the ARN and external ID with us via a secure method (e.g., encrypted email or a shared password manager).

Option 2: Creating Access Keys (Alternative)

Creating Access Keys (Alternative) picture


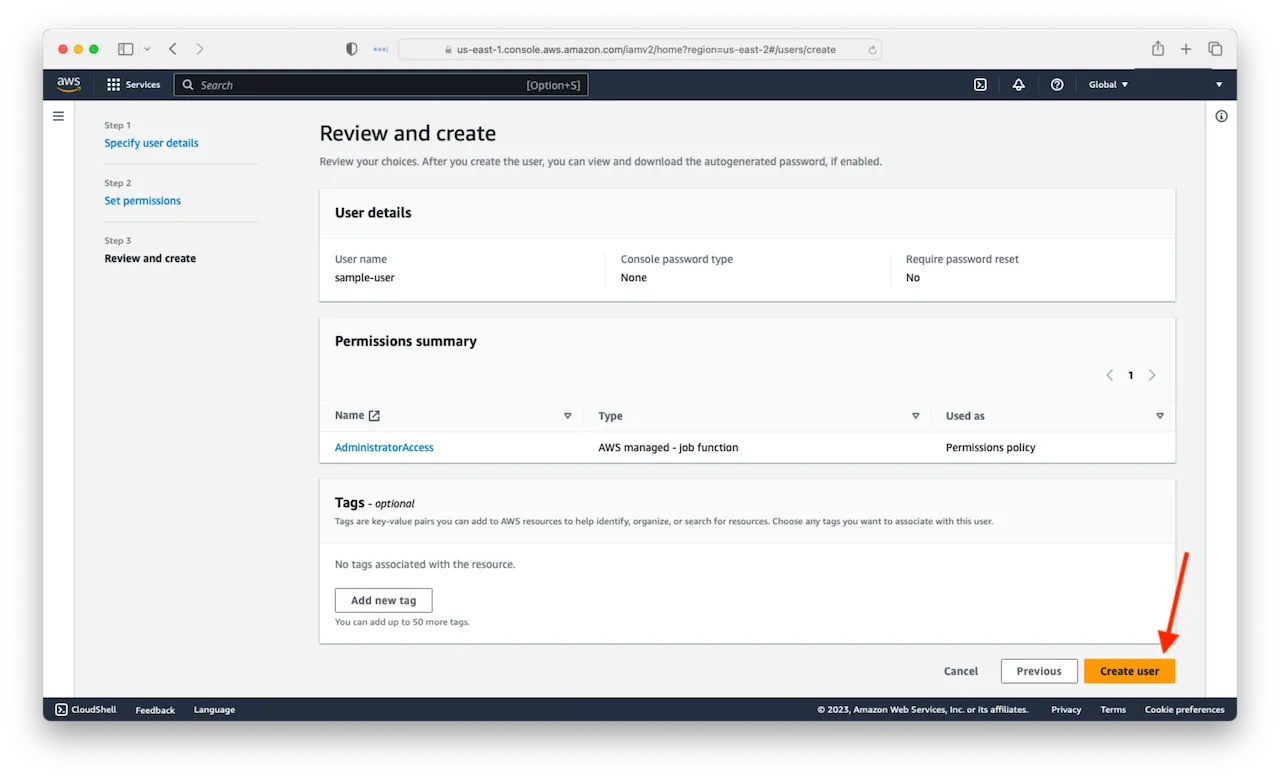
If an IAM role isn’t feasible, you can create access keys for an IAM user. Use this option only if instructed by our team.

  1. Create an IAM User:
    • In the IAM dashboard, click Users in the left menu and then Add users.
    • Enter a username (e.g., “TeamAccessUser”) and select Access key - Programmatic access.
    • Click Next.
  2. Assign Permissions:
    • Attach permissions (e.g., AdministratorAccess or specific policies as discussed).
    • Click Next, review, and click Create user.
  3. Download Access Keys:
    • After creating the user, you’ll see an Access Key ID and Secret Access Key.
    • Click Download .csv to save these credentials.
    • Share the .csv file with us securely (e.g., via encrypted email).
💡 Pro Tip

Never share access keys via unencrypted email or public channels. Use a secure method like a password manager or encrypted file transfer. Delete or rotate access keys after sharing if possible.

Step 4: Enabling Multi-Factor Authentication (MFA)

Enabling Multi-Factor Authentication (MFA)


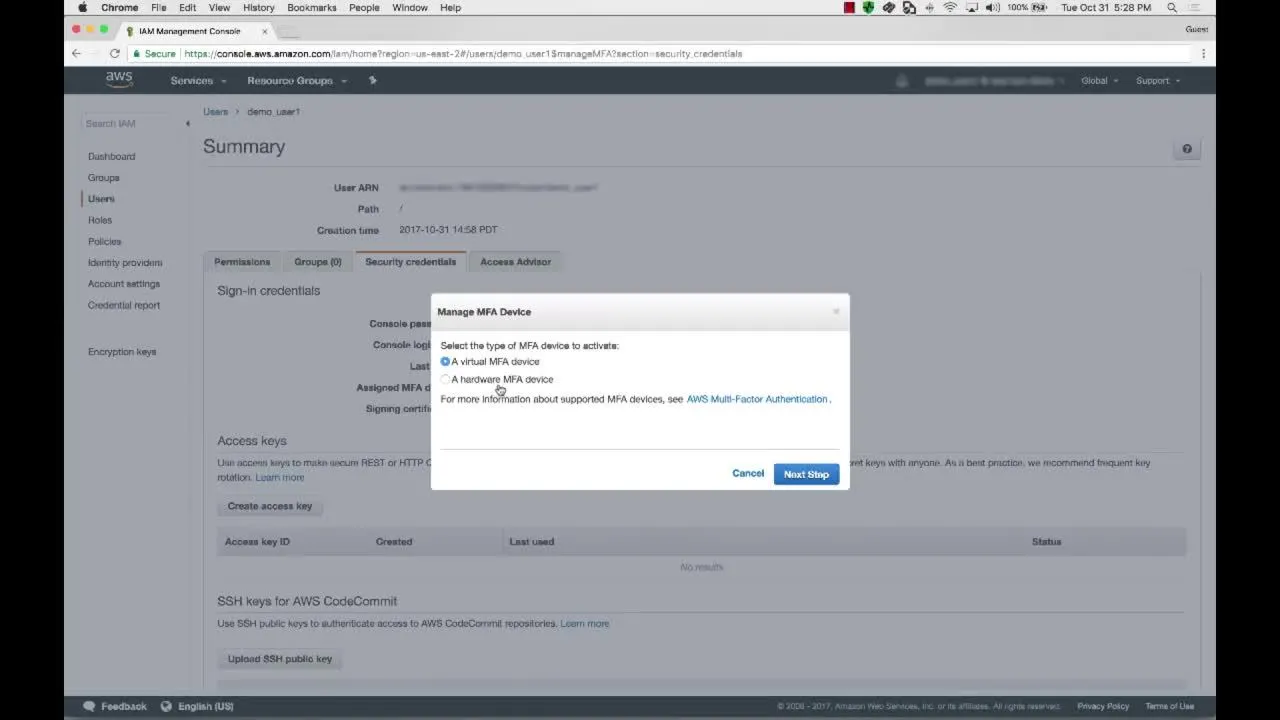
To protect your AWS account, we strongly recommend enabling MFA for your root account and any IAM users.

  1. Access the IAM Dashboard:
    • In the AWS Management Console, search for IAM and open the dashboard.
  2. Enable MFA for Your Root Account:
    • Click Dashboard in the left menu and find the Security recommendations section.
    • Click Enable MFA next to “Root user MFA.”
    • Follow the prompts to set up MFA using a virtual authenticator app (e.g., Google Authenticator or Authy) or a hardware device.
    • Scan the QR code with your authenticator app and enter the generated codes to complete the setup.
💡 Pro Tip

Enable MFA for all IAM users with access to your account to add an extra layer of security.

Step 5: Next Steps

Once you’ve completed these steps, please share the following with our team via a secure method:

  • The IAM Role ARN and external ID (preferred) or the IAM user access keys.
  • Confirmation that your payment method is set up and verified.
  • Confirmation that MFA is enabled for your root account.

We’ll take it from there to begin working in your AWS environment. If you encounter any issues or have questions, contact us at [your support email or phone number].

Additional Tips:

  1. Check the AWS Free Tier: AWS offers a Free Tier for new accounts, which includes limited usage of certain services for 12 months. Review your usage in the Billing Dashboard to stay within free limits if applicable.
  2. Explore the AWS Management Console: Familiarize yourself with the console to monitor services and costs.
  3. Contact AWS Support: If you run into issues, AWS offers support through the AWS Support Center.

Thank you for choosing us to help you with your AWS journey.

Best Practices for AWS Account Setup 

Once you create an AWS account, it’s tempting to dive straight into building projects. But taking a few smart steps upfront can save you headaches down the road. 

Here are some best practices to follow for a secure and well-managed AWS environment.

1. Use a Professional Email When Signing Up

When you go through the AWS signup or AWS console sign up, always register with a professional or team-based email instead of a personal one. For example, use something like ‘aws-admin@yourcompany.com’.

This makes it easier to manage the account if staff change or if multiple people need access. It also keeps business operations separate from personal activities.

2. Enable Multi-Factor Authentication (MFA)

Security should be your first priority right after Amazon Web Services account creation. Enabling Multi-Factor Authentication (MFA) adds a crucial extra layer of protection beyond your password. 

For instance, you might use an app like Google Authenticator to generate temporary codes. Even if someone steals your password, they won’t get into your account without the second factor.

3. Set Up Billing Alerts and Budgets

It’s easy to lose track of costs in the cloud, especially when you’re getting started with AWS. Head to the Billing section after you create an AWS account and set budgets or alerts to notify you if spending goes over a certain amount. 

For example, you could set an alert for $50 to ensure your testing doesn’t accidentally rack up large bills. This is particularly important if you’re exploring how to setup an AWS Free Tier account and want to avoid unexpected charges.

Hint: These days, people are using AI Agents to handle such tasks!

4. Create IAM Users and Avoid Root Access for Daily Tasks

After AWS registration, avoid using the root account for daily work. Instead, create IAM users with only the permissions they truly need. 

For example, you might create an admin user for infrastructure management and a read-only user for billing review. This minimizes risks if credentials are exposed and follows the principle of least privilege.

5. Use Naming Conventions for Resources

As your projects grow, it becomes harder to remember which resource does what. Right after your AWS new account setup, establish clear naming standards for things like EC2 instances, S3 buckets, and IAM roles. 

For instance, instead of naming a server “TestServer,” you might name it “dev-webserver-app1.” This makes management, cost tracking, and troubleshooting much easier.

6. Organize with AWS Organizations for Multiple Accounts

If you plan to manage multiple projects or environments, consider using AWS Organizations. It helps you create and manage separate accounts under one umbrella, making billing and security controls simpler. 

For example, you might have separate accounts for development, testing, and production environments. This strategy improves security boundaries and simplifies cost allocation after your initial Amazon Web Services account creation.

7. Regularly Review Permissions and Access Logs

It’s important not to set and forget your cloud environment. Schedule regular reviews of who has access to your account and what permissions they have. 

For example, check IAM policies and CloudTrail logs monthly. This helps spot unnecessary privileges or unusual activity early, keeping your account secure after the AWS create account steps are completed.

Final Verdict: 

Setting up your AWS account is more than just filling out forms. It’s the foundation for everything you’ll build in the cloud. 

Following each step carefully, from signing up to securing access with IAM roles and MFA, helps protect your data and your budget.

By applying AWS account setup best practices, you’ll avoid common mistakes and set yourself up for smooth operations, whether you’re experimenting with the AWS Free Tier or running mission-critical workloads.

Remember, your Amazon Web Services account creation is the start of a powerful journey into modern cloud computing.

Need expert help navigating your setup or optimizing your AWS environment?

Author-image
Usman Ali
Tech Lead
Author

Usman is a dynamic tech lead with 10+ years of experience in building scalable web applications and APIs. He’s skilled in RoR, Angular, Vue, Ember, and other modern frameworks. 

Known for solving complex problems with clean, efficient code, he helps teams deliver fast and future-ready products.

Check Out More Blogs
search-btnsearch-btn
cross-filter
Search by keywords
No results found.
Please try different keywords.
Thank you! Your submission has been received!
Oops! Something went wrong while submitting the form.
Complex AWS Setup
Get Exclusive Offers, Knowledge & Insights!

FAQs

Is an AWS account free?

How do I set up my AWS account?

How to set up an AWS IAM account?

How to get a 12-digit AWS account number?

Can I delete my AWS account?

Share this blog
Looking For Your Next Big breakthrough? It’s Just a Blog Away.
Check Out More Blogs